
I’m a big fan of the Discord Musicbot, and run it on some Discord servers that I admin. Wanting to run it on a server, I first created an Ansible playbook and launched a server on Digital Ocean. But after a few months, I noticed that the server was sitting over 90% idle. Surely there had to be a better way.
So I next tried Docker, and created a Dockerized version of the Musicbot. I was quite happy with how much easier it was to spin up the bot, but still didn’t want to run it on a dedicated server on Digital Ocean. Aside from having unused capacity, if that machine were to go down, I’d have to do something manually.
I thought about running it in some sort of hosted Docker cluster, and came across Amazon’s container service. So this post is about creating your own cluster in ECS and hosting a Docker container in it. I found the process slightly confusing when I did it the first time, and wanted to share my experience here.
Before We Begin
I’m just going to scratch the surface of how to use AWS ECS. I won’t be covering:
- Fargate
- Networking between containers
- Persistent Storage
What I will be covering is a relatively simple use case for a container: downloading content (from YouTube) and uploading content (audio to Discord).
Setting Up The Cluster
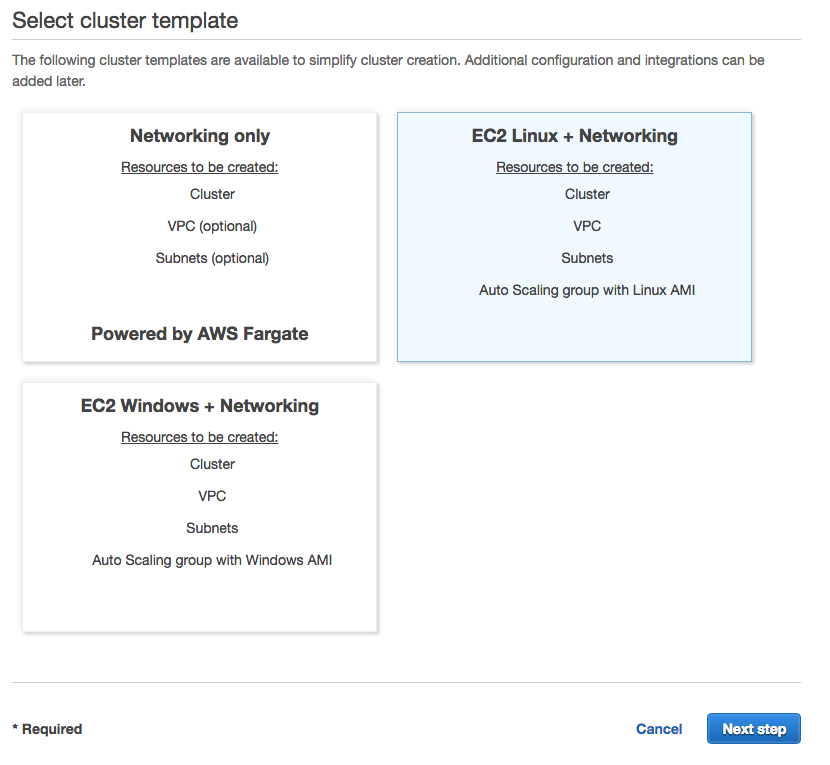
Start by clicking “Create Cluster” in ECS and choose the “EC2 Linux + Networking” option:
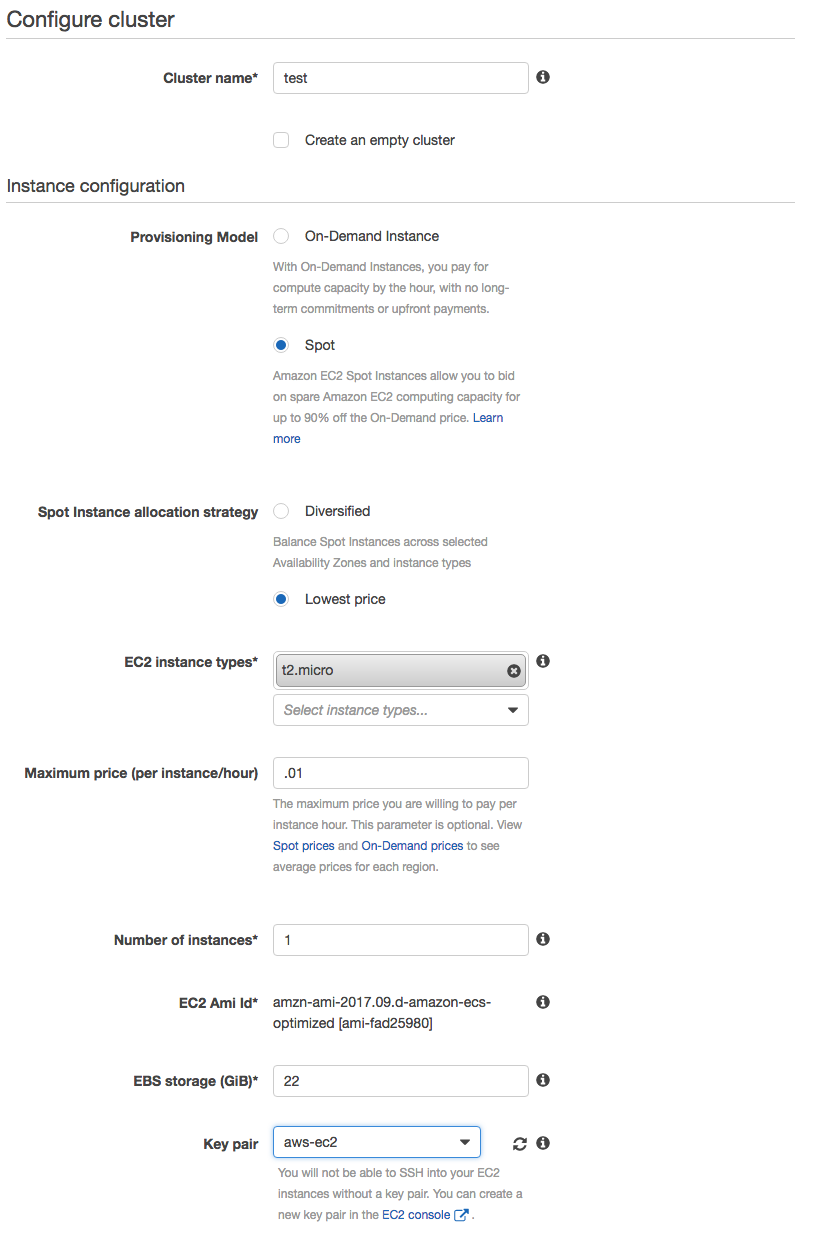
Next, name your cluster, choose a spot instance, a size of t2.micro, and a maximum price of 1 cent per hour. As of this writing, t2.micro instances are .44 cents/hour, and the maximum price of 1 cent will cause your instance to terminate if the price goes above that. While that may introduce some instability, it will also keep costs down. Naturally, if you don’t mind paying more, you could instead choose an on-demand instance.
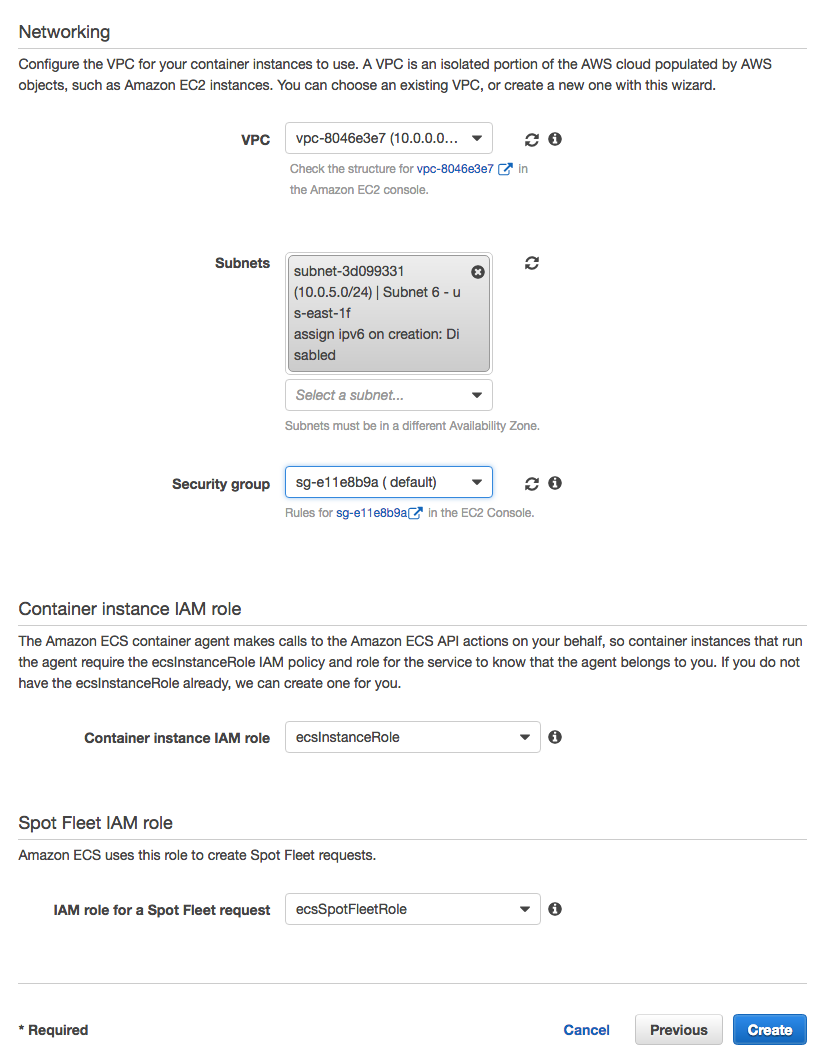
The last step of creating your instance is to choose a VPC, subnet, security group, and IAM rules. If you are new to AWS, don’t worry — you’ll have the option to create each of these.
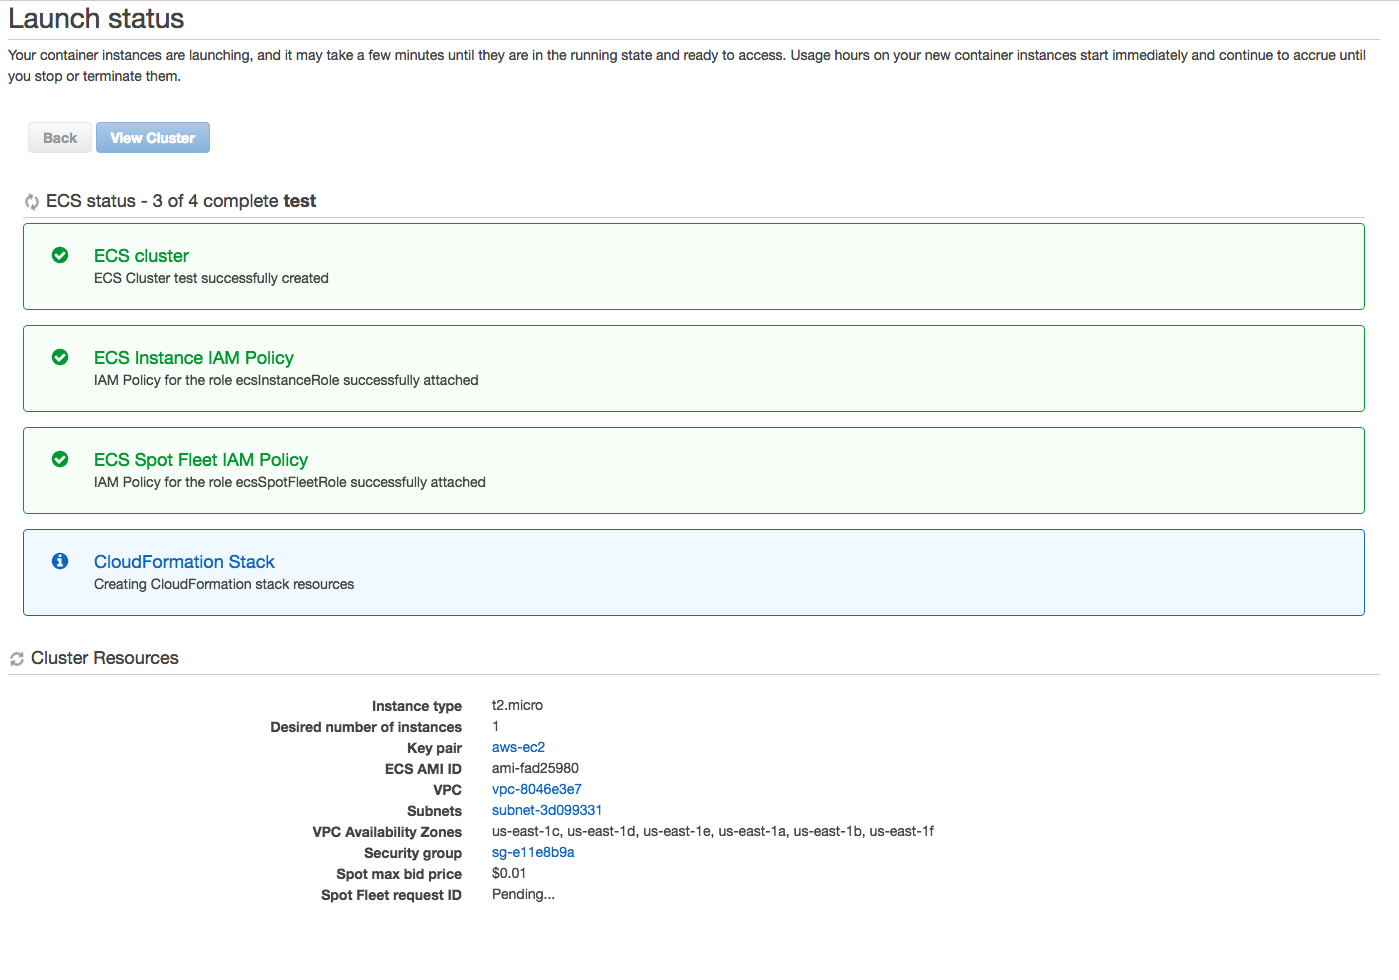
Finally, you’ll get to the page that tells you your cluster is being set up.
What’s really neat is that the whole process is just a wrapper for a template which gets passed into CloudFormation. This is a great example of how some AWS services are just ways of re-using other services. Composability is a good thing!
Using the Docker Cluster
If you go into the EC2 control panel, you’ll see the instance that was created, and you can even SSH into it as the ec2-user if you want to. Should you do that, you’ll see that nothing is currently running under Docker:

You would think this is normal, but it’s not. AWS has a container which runs as an agent that “represents” that node to the cluster. If that agent isn’t running, that node doesn’t show up as being part of the cluster.
As best I can tell, this is because there is less CPU available on such a small instance, so the agent isn’t spun up right away. Instead, you have to wait about 5–6 minutes until you see messages like these in the syslog:
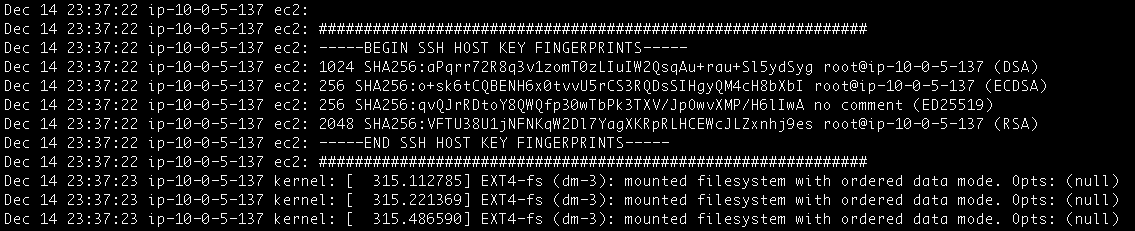
When you see that, a “docker ps” will show that the agent is running:

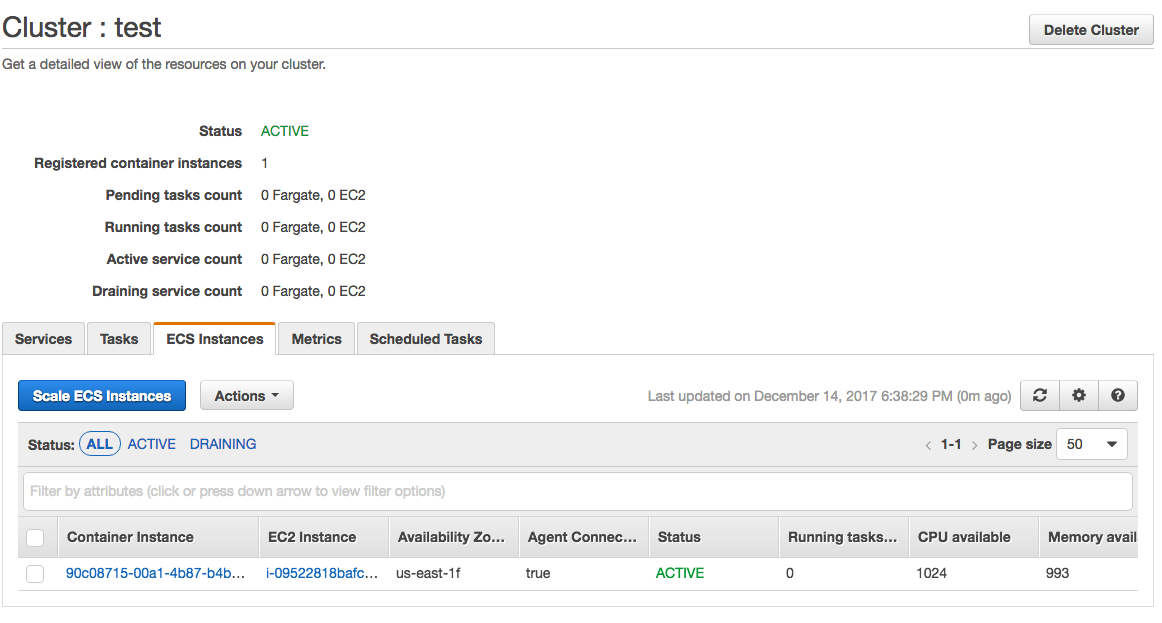
…and the ECS Instance will also show up in the UI:
Now you’re ready to start launching containers.
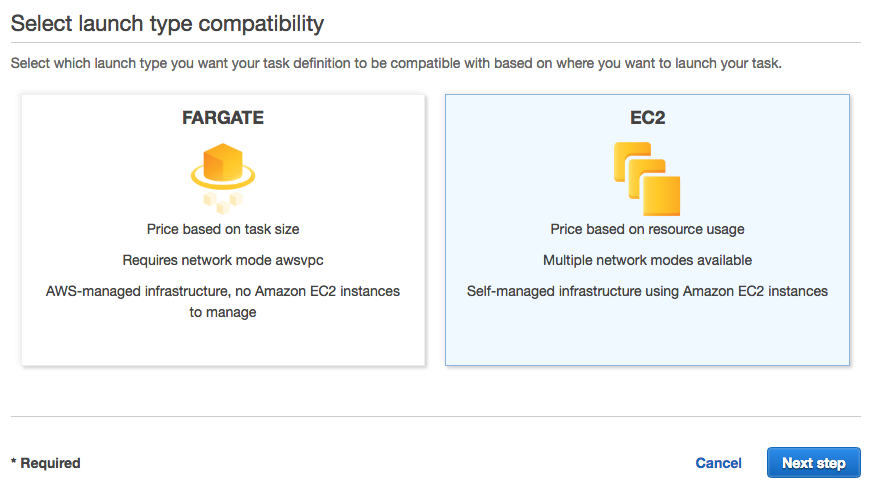
Define A Task
In EC2, a task is a self-contained unit which can hold zero or more containers. What we’re going to do is define a single task which holds a single container. Start by clicking “Create New Task Definition” under “Task Definitions” and choosing “EC2”:
Next, name the task, assign the roles (AWS will helpfully create one if this is your first time here), leave Network Mode to “default”, and set task memory to 1 MB and CPU to 128 units. Those units really don’t matter for EC2 clusters, but AWS won’t let you skip them, either:
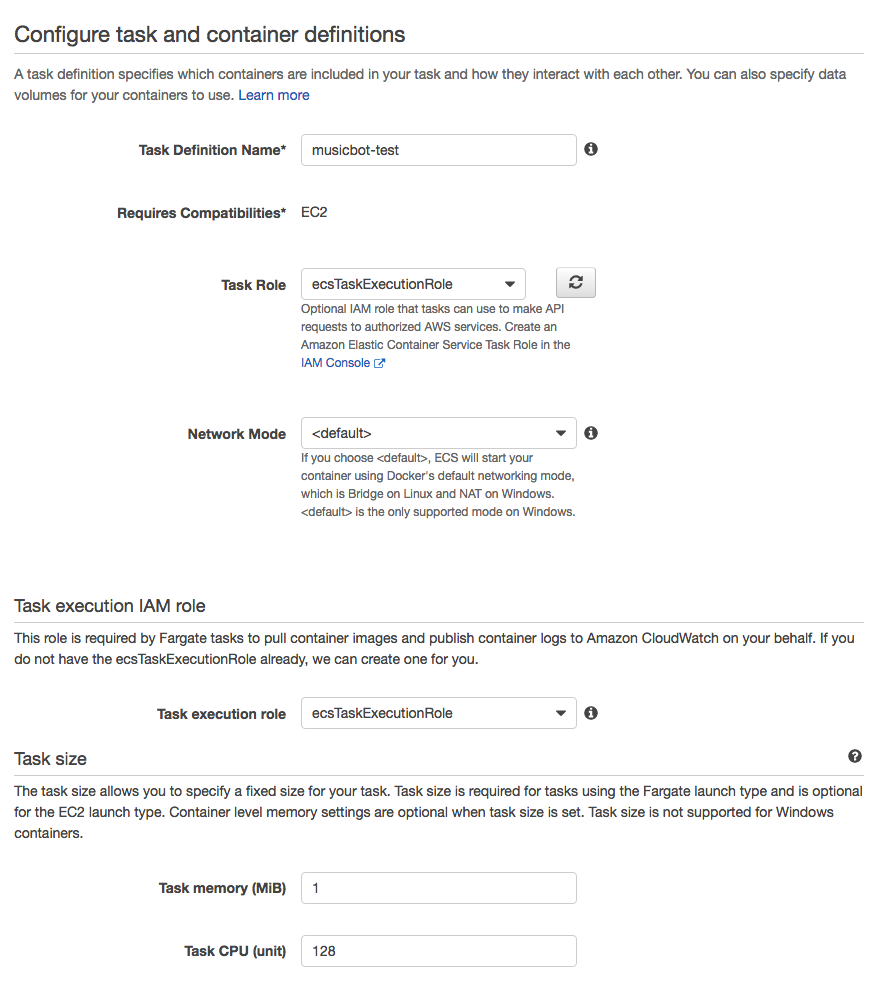
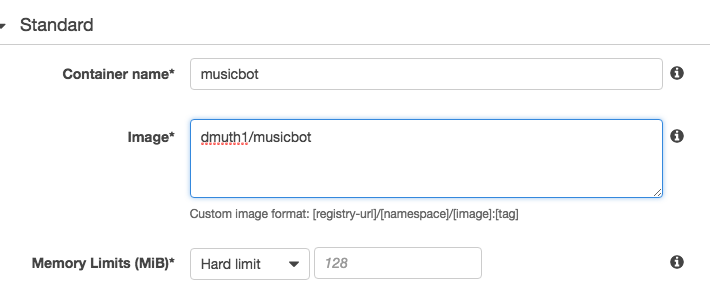
Halfway down is a button that says “Add Container”. Click it and you’ll be taken to a big screen for the container. All you really care about is the container name (it can be whatever you want), the image (it should be dmuth1/musicbot, and will be pulled from Docker Hub), and the environment variables.
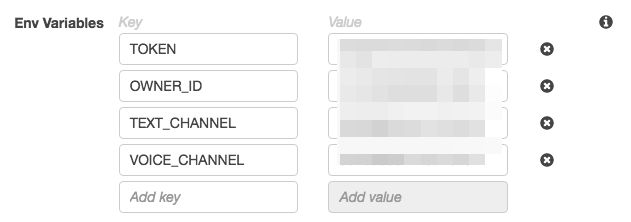
The environment variables are specific to the Musicbot and will not be covered here. There is extensive documentation on that over here.
Add The Task To The Cluster
Finally, this is the last task. Go to the “Services” tab in your cluster and click “Create”. You’ll want to set the launch type to EC2, choose the task definition and cluster, and type in a service name. The number of tasks should be 1 and the minimum healthy percent should be changed from the default of “50” to “100”. This will ensure that once instance of your container is running at all times. (This comes into play if say, the bot crashes)
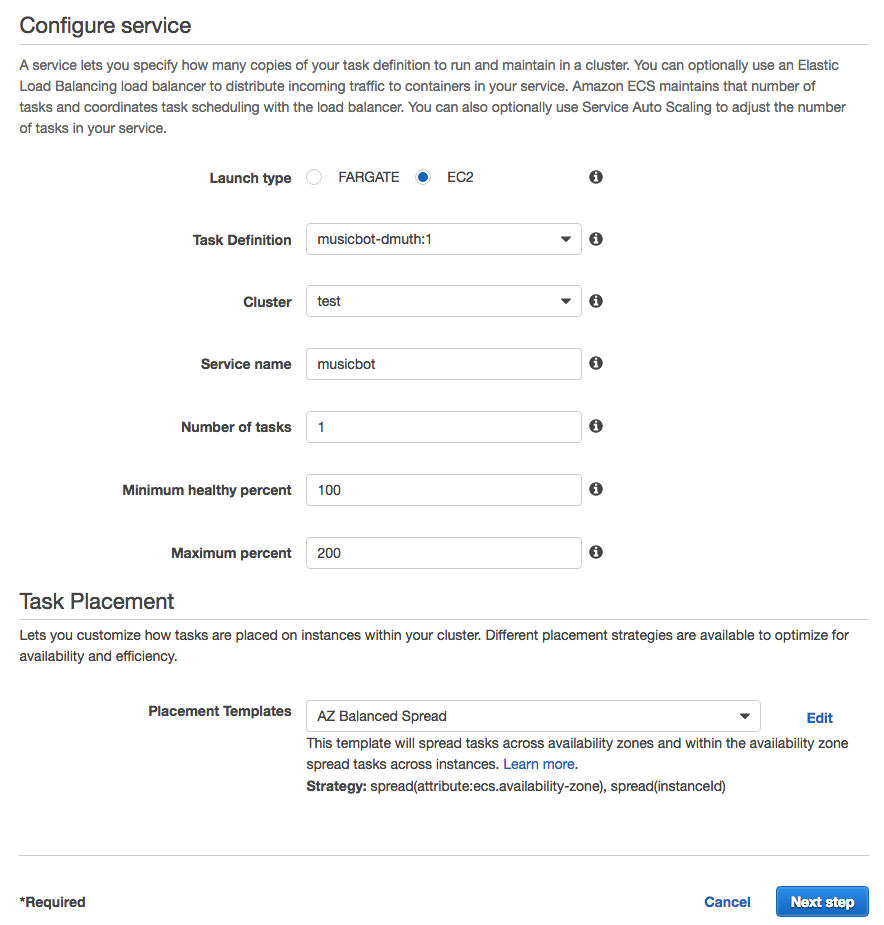
You can skip the next two screens (Networking and Auto Scaling) and instead just create the service.
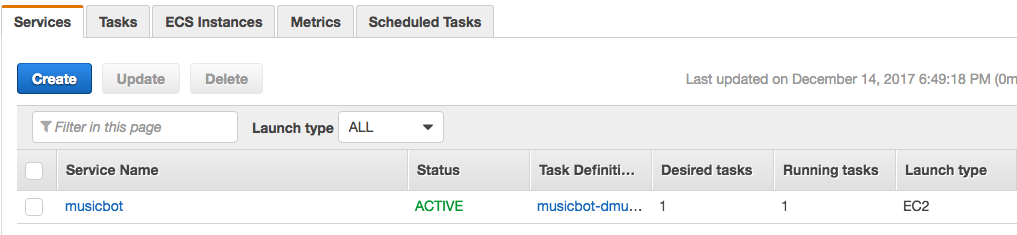
The service should now show up un the “Services” tab with 1 running task:
…and, if everything is configured correctly, the bot should join a voice channel on your Discord Server:

Joining that voice channel will now stream music to your computer or phone.
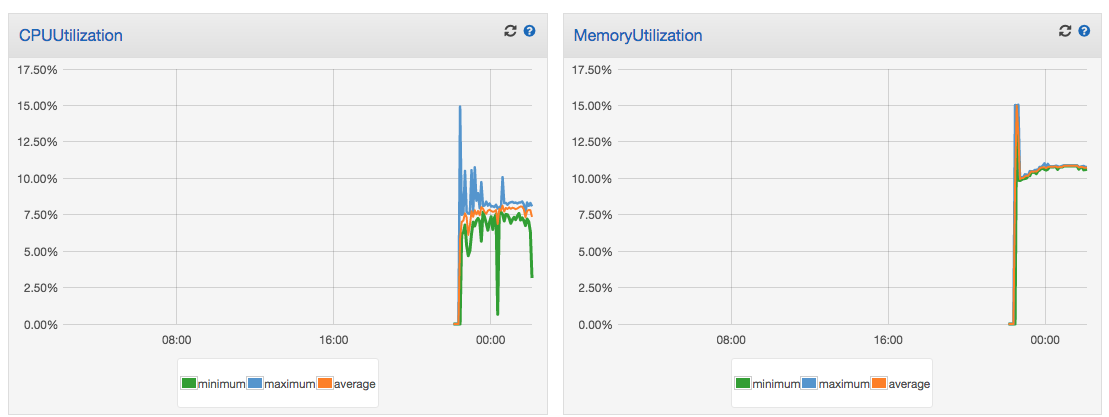
Resource usage, in case you’re curious, is actually pretty light:
Troubleshooting
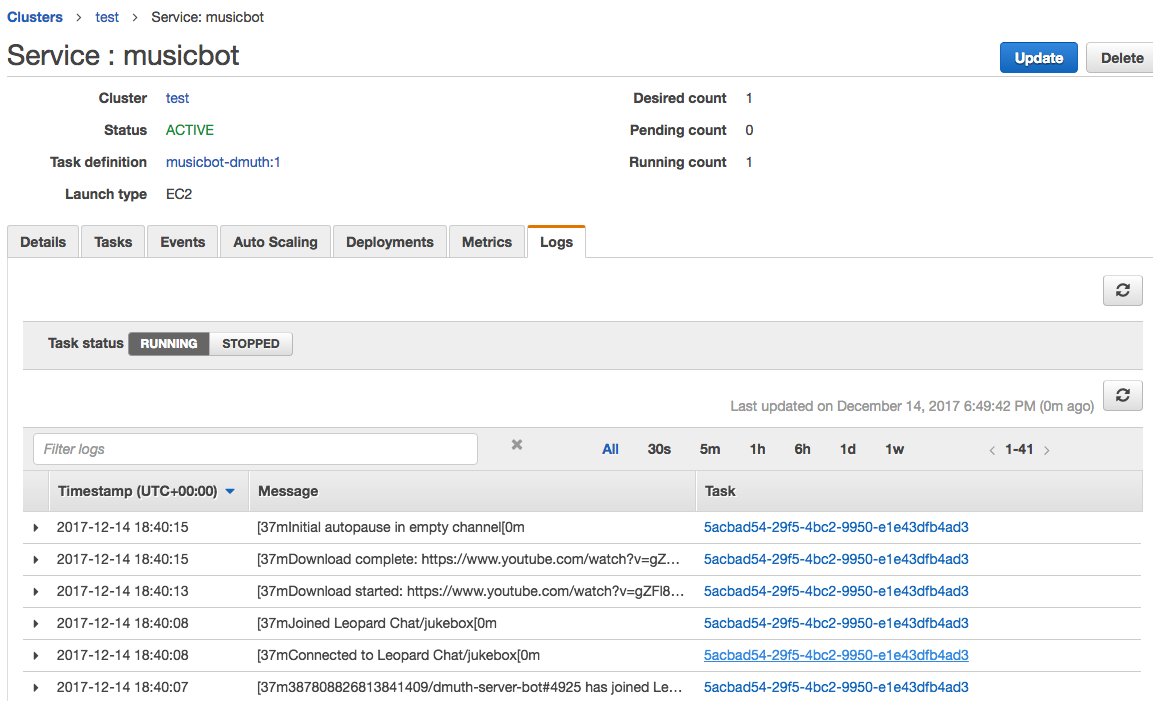
If things don’t work out, there is a “Logs” tab for that service which will show logs for each container:
If the cause still isn’t clear, I would recommend double-checking the environment variables defined in the task’s container, and as a last resort, try launching the container from the command line on your own machine, and see what happens.
Conclusion
Yeah, this guide was kinda long. But we covered a lot of stuff here, and you were hopefully able to stand up your own cluster and a container with a working music bot.
Got questions, comments, or feedback? Feel free to leave them in the comments here, or hit me up on Twitter.
— Doug